Citing Sources In Word 2010
A bibliography is a list of works cited in a piece of writing. Professional researchers, scholars and students routinely write research papers that contain bibliographies. Citing sources in the proper format (that is, the format your school requires, or the format expected by members of your profession) can be a daunting task because there are so many rules (and exceptions to those rules) regarding the proper capitalization, spacing, and indentation of listings.
Word 2010 has made the arduous task of citing sources a little less daunting. Word’s ability to automatically generate bibliographies or lists of works cited in any of a variety of well-known formats, including MLA and APA (the big two for academia) is a godsend for anyone who needs to write a document that contains a bibliography.
When citing sources in Word, you need to follow four simple steps:
- Choose a citation style – choosing the style you think you are most likely to use helps Word present the appropriate fields in which to enter information about your sources.
- Type in your sources – You can type these in all in one go, or individually as you write the document.
- Insert references in your text – when you want to refer to one of the sources in the document, you insert a code that places either a parenthetical reference to the source or a footnote or endnote, depending on the requirements of the citation style you chose in step 1.
- Generate a bibliography – When the document is complete, you generate a bibliography page that presents all the sources from step 1 in a specified format. Some citation styles call this a Works Cited page.
With these steps laid out, let’s cite some sources in Word 2010!
Choose A Citation Style
A citation style is a set of rules that specify the formatting for various types of sources. You can change the citation style at any time in your document’s creation, but Word’s citations and bibliography tools work best if you set the citation style before you start to enter your sources. If you do choose a different citation style, you do not have to reenter all your source information, as Word will transfer existing information to the new format.
To select a citation style, click References > Style (in the Citations & Bibliography group).
For our example, we’re going to use MLA Seventh Edition (see MLA Works Cited).
Type In Your Sources
When you start typing in your sources, Word displays the field text boxes to fill in based upon the type of source being used. When typing in information about a book, for example, Word prompts you for fields such as Author, Title, and Publisher. On the oter hand, for a piece of artwork, it prompts for fields that include Artist, Title, and Institution.
To start typing in your sources, stay on the References tab and click Manage Sources. In the Source Manager window that opens, click New.
In the Create Source window, type in details about the source. Here’s an example of a source that is a book:
When entering the Author, Word recognizes the formats First Middle Last and Last, First Middle. Separate multiple authors with semicolons. If the author is an organization, check the Corporate Author box and enter the organization’s name. When you’ve finished entering details about a source, click on OK to save them. A new entry for this source will then appear in the Source Manager window. You can revise those details by selecting the source and clicking the Edit button. Similarly, if you decide you no longer need a source, you can select it and click Delete.
Insert References In Your Text
When you insert a reference to a source in your text, it is displayed in parentheses. Depending on the citation style you are using and the type of source you are citing, the parenthetical citation includes one or more of Author, Year, Title and Page Number.
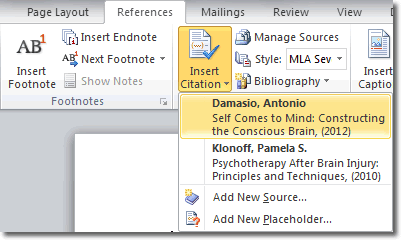
To insert a citation, place the cursor where you want it to go and click Insert Citation (again in the same group on the References tab). A list of all the sources available is displayed: select the one you want to insert.
The Insert Citation command also gives you the option of creating new sources as you need them in the document. In this case, you would select the Add New Source option from the menu above.
Generate A bibliography
Your bibliography appears at the end of the document and lists all the sources cited. Typically, sources are displayed alphabetically by the author’s last name. The citation style used by the document dictates what information appears in the bibliography. There is variation in the use of bold and italic, order in which information is presented, whether the author’s full or last name is used, etc in the different styles.
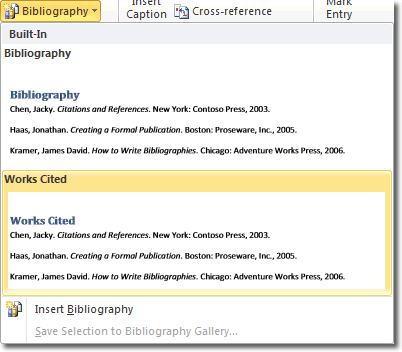
Word has two built-in bibliography layouts:
- Bibliography – begins with a Heading 1 styled “Bibliography” paragraph, followed by the entries in a paragraph style called Bibliography. The bibliography doesn’t start on a new page.
- Works Cited – same as Bibliography, except the text at the top is “Works Cited” instead. It does not start on a new page.
To generate a bibliography, place the cursor where you want it to go and click Bibliography. Choose one of the above two layouts.


